 RSS Feed
|
And that’s a wrap for this year. Just yesterday I was able to get the results of the showcase and judges feedback. Overall, the judges were very impressed (phew!). They were very impressed by the fact that we made an app to accompany this sensor. Furthermore the results are in and my partner and I apparently scored very high with all of the judges and our classmates were just as spectacular as us! Great job to the Robotics 1 class and even though I wont be taking Robotics 2, I hope my classmates still have an amazing showcase next year! Thank you to Mrs. Heshiki and the crazy robotics class, it’s been a fun year!
0 Comments
Today was the day of our presentation, and the outcome was largely successful! I was able to reveal my asset that accompanied our sensor . . . A very simple app. Using app sheets I created a small app that can receive imputed information and upload them to a google spreadsheet. I made a community email account so anyone can download it which is [email protected] with password iolaniapps. Anyone can download this and follow the instructions to get the Alawai Monitoring Team App installed onto their phone and start uploading any data that they receive from their sensors — turbidity, temperature, or ultrasonic. While at the presentation many questions popped up as well such as what would happen i they wanted to go to any other depth. That’s why I added a small change to the code after the second and third judge that allowed for you to manually choose when to start rolling the sensor down and stop when they felt it was the right depth. I also did the same for going up. However, we were also able to see and promote the strengths that came with our final design. One of the bigges things was the stability of our sensor. The use of the wooden board was able to balance the sensor and keep it stable. However, there was a question off Also, the code was also very user friendly which many people loved. They seemed to really like the instructions and how easy it was to use. Overall it was a small victory and many people enjoyed the accompanying app. 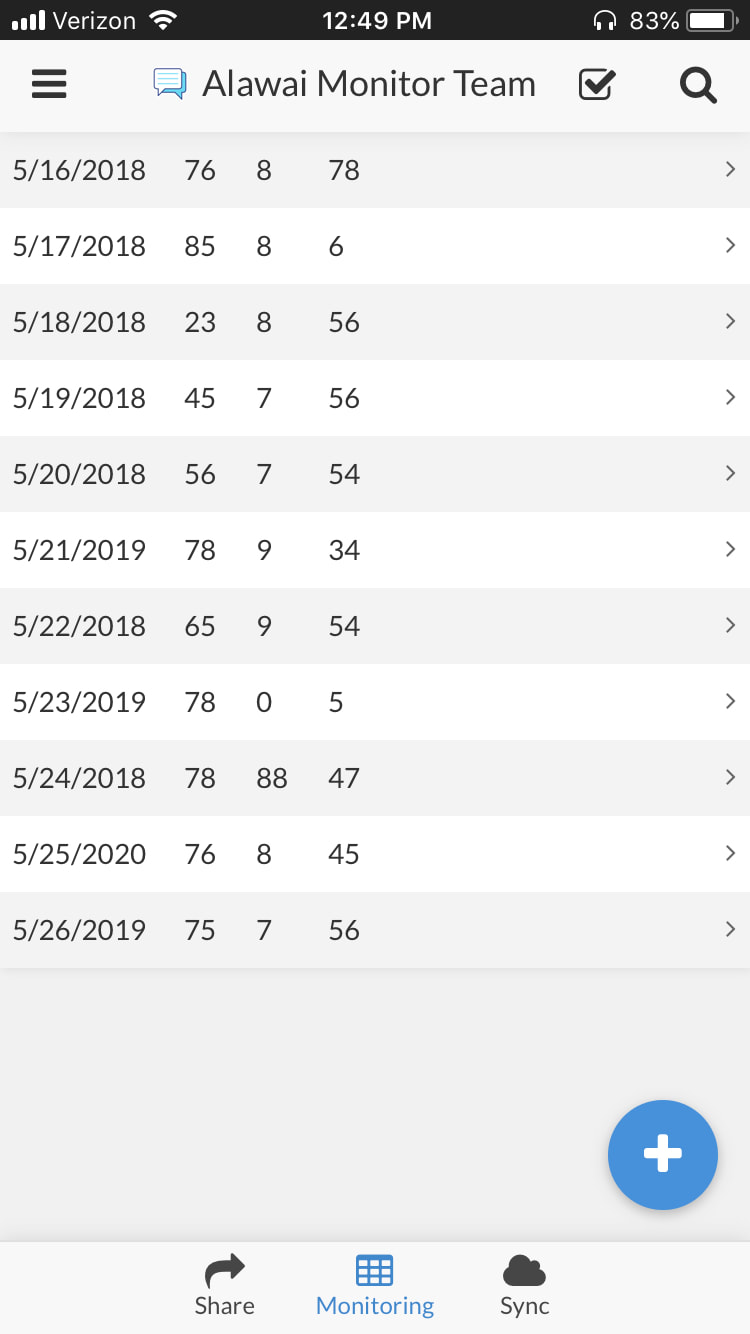 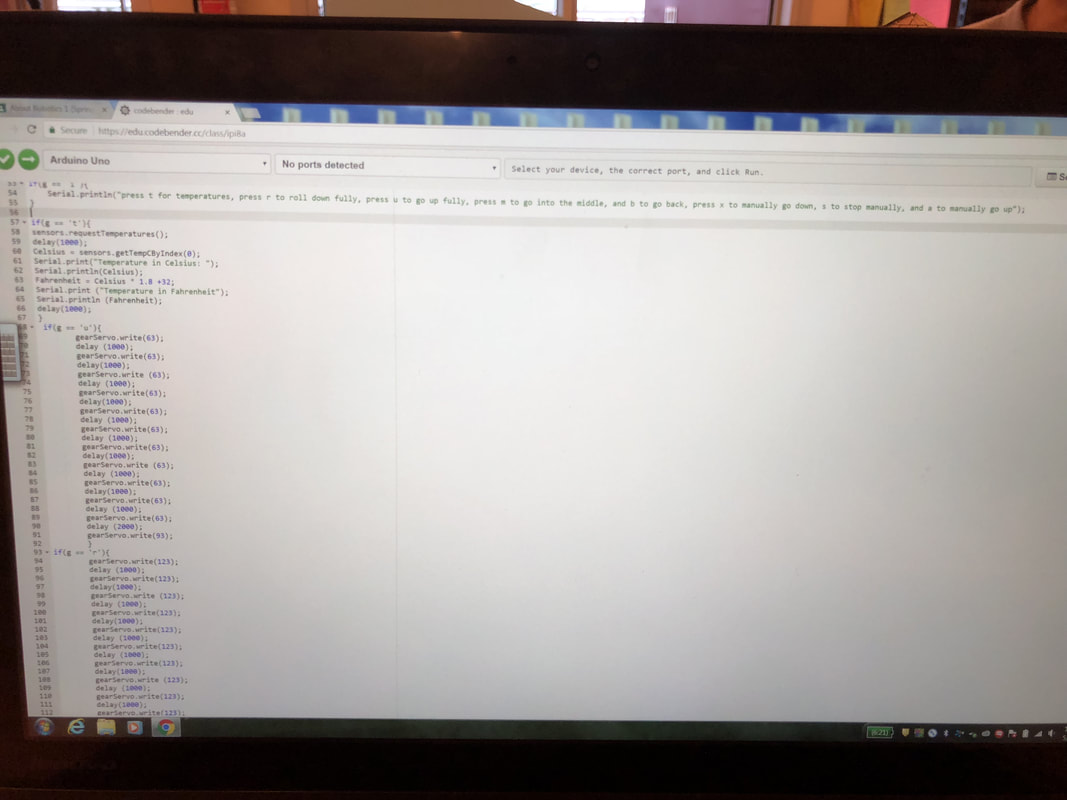   We only have one more day before the presentation . . . And our wiring falied! This is a huge setback we still have two fix. Out motor however do work fine as we tested it in the pool and recibved no problems and all setting worked fine. However, the temperature is no longer sending a correct reading. This could prove troublesome with only one day left before the showcase. Also, to give our project a bit of an edge, I’ve decided to add something small and reveal it at the showcase . . .
New update on the sensor project! Thebuild of the project remained largely the same, however the code has change slightly. First, we addded a new position for the temperature sensor to go halfway down by entering the command m. Furthermore, to make our system even more user friendly, we added a button for instructions so anyone can use the sensor that we built. To do this I added a command to have the arduino print out the statement “press i for instructions” at the beginning of the program. Then if the user were to press i, the arduino would print out all the commands available to the serial monitor. So very simple updates to the code as a whole, but new update on the class, my teammate and I did decide to lend our code to another group so they could use it on their sensor. However, that does mean we now need another unique aspect to our sensor other than our code since that team’s sensor does have many other unique aspects other than their code which we lent. My partner and I are deciding on anything that could make our sensor and project pop a little more.
Big update today! Starting off with our build. We ran into a problem with the spool compared to the height of the motor, so my partner and I designed a small 3D printed part that allowed for the motor to be at a higher position for the spool to roll correctly. Furthermore, the design for the build is nearly complete. We drilled a hole into the stand for the motor and used hot glue and a zip tie to secure the motor to the stand. We then hot glued the stand to the board so it is firmly in place. The arguing and bread board were also hot glued to the wooden board. Testing for the new program I made has also begun. I was able to find the solution to the problem with the serial monitor receiving commands. What I had to do was program the arduino to send temperature readings from the one wire temperature sensor ON COMMAND. What this means is that instead of constantly printing and updating the temperatures it is receiving, we instead enter a single letter into the serial monitor to have the arduino print out the temperatures in both Celsius and Fahrenheit. We also were able to get the timing correct for the motor to rotate the spool fully down and fully up. A problem we ran into with this was that the motor suffered a bit more resistance going up than down due to it pulling the weight of the sensor up instead of down. However, we were able to solve this by adding another second of rotation time for the motor to go up instead of down.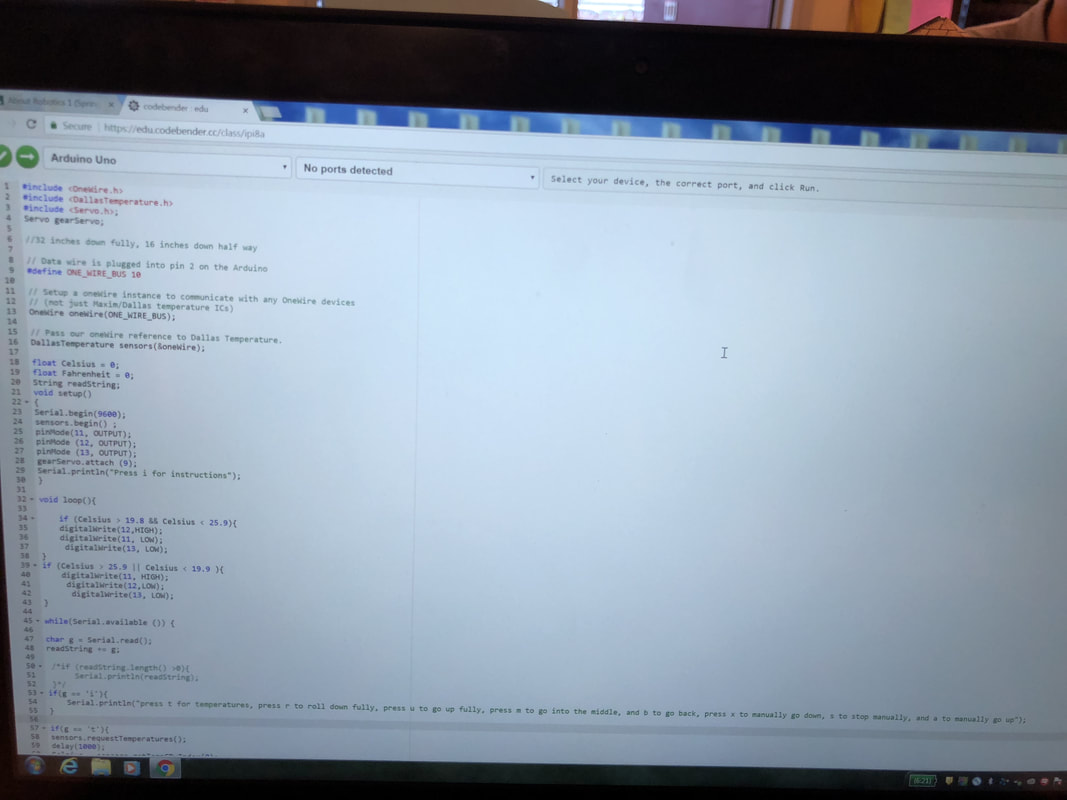  Another update on the temperature sensor! First on the build, we have competed the mount for the motor to use so that it is in line with the spool. It measured right the first time so we had no complications there. Now there’s a huge update with the code! To start off we got the LED’s to work.To do this as seen below i used if conditions. What this basically does is check if the temperature variable I had created is between a certain threshold and if it is then I would either light the green or red LED. If there is more time, I will make another threshold for a yellow LED for even more accuracy through the visual detector. There were some problems doing this but it was mainly because of a few simple mistakes in the wiring, such as forgetting to wire the led back to ground. Now we are trying to currently program the motor but the huge problem is to make the motor rotate on command. To do this. Need to use the Serial Monitor, however the code is using the Serial Monitor to outprint the temperatures constantly adn therefore the serial monitor is never available to take commands. There will be a new update when I find a solution to this. Until then!
An update on out temperature sensor development! We had to fix the spool to be able to spin and release the temperature one wire sensor. However, the adjustment was not huge. All we did was change the positioning of the motor and spool so that the wire would roll off. Furthermore the realization we had was that our spool was not spinning and releasing the wire because unlike other spools, the wire was attached ton something outside of the spool. Therefore to fix this we are going to hot glue part of temperature sensor and see if that will help. Furthermore we 3-D printed part of our spool and got the rod to fit after so many failed attempts. Update with the code! The temperature sensor code is nearly complete. It took some trial and error to finally be able to get a working code that prints in both Celsius and Fahrenheit. They code below works by doing the following. First, it sets up a new sensor object. For those who dont know, an object is kind of like making a digital version of what it is your making in real life. It creates an instance of something and takes properties of the class it is part of. This class was included as part of the library we have. For example if the external library included a “dog” class, we could make a new dog object called myDog and it would have all the characteristics listed in the dog class such as fur color and happiness etc. Continuing on after we setup and made the temperature sensor object, i used many different commands that were included in the external library. What it basically ode sin the loop is constantly request for temperatures from the sensor. The sensor will then give the computer the temperatures it is picking up in Celsius. So i make float variable Celsius set to whatever the computer receives from the temperature sensor because it is already in Celsius. To get the system to print in Fahrenheit, I set the Fahrenheit float equal to the conversion equation of whatever Celsius is. I then have each of them repseictively print out the temperature in Fahrenheit and Celsius. Next up we have to program the LED’s!
|
AuthorWrite something about yourself. No need to be fancy, just an overview. Archives
May 2018
Categories |
Photo used under Creative Commons from daryl_mitchell
